GE TLS (Authenticated)
GE TLS (Authenticated)
This guide explains how to configure a GE ultrasound machine to securely send DICOM studies to HeartLab using authenticated TLS (mutual TLS with client certificate authentication).
Before You Begin
You will require:
- Administrative access to the GE ultrasound machine
- Access to HeartLab DICOM settings
- A USB drive for transferring certificates
Information Required for Setup
The first step is to gather the required HeartLab DICOM connection details.
- Navigate to Settings > Integrations > DICOM
- Select View DICOM Endpoints.
- Under DICOM via TLS, note the following values:
- Server AE Title
- Server IP Address
- TLS Port (
11112)
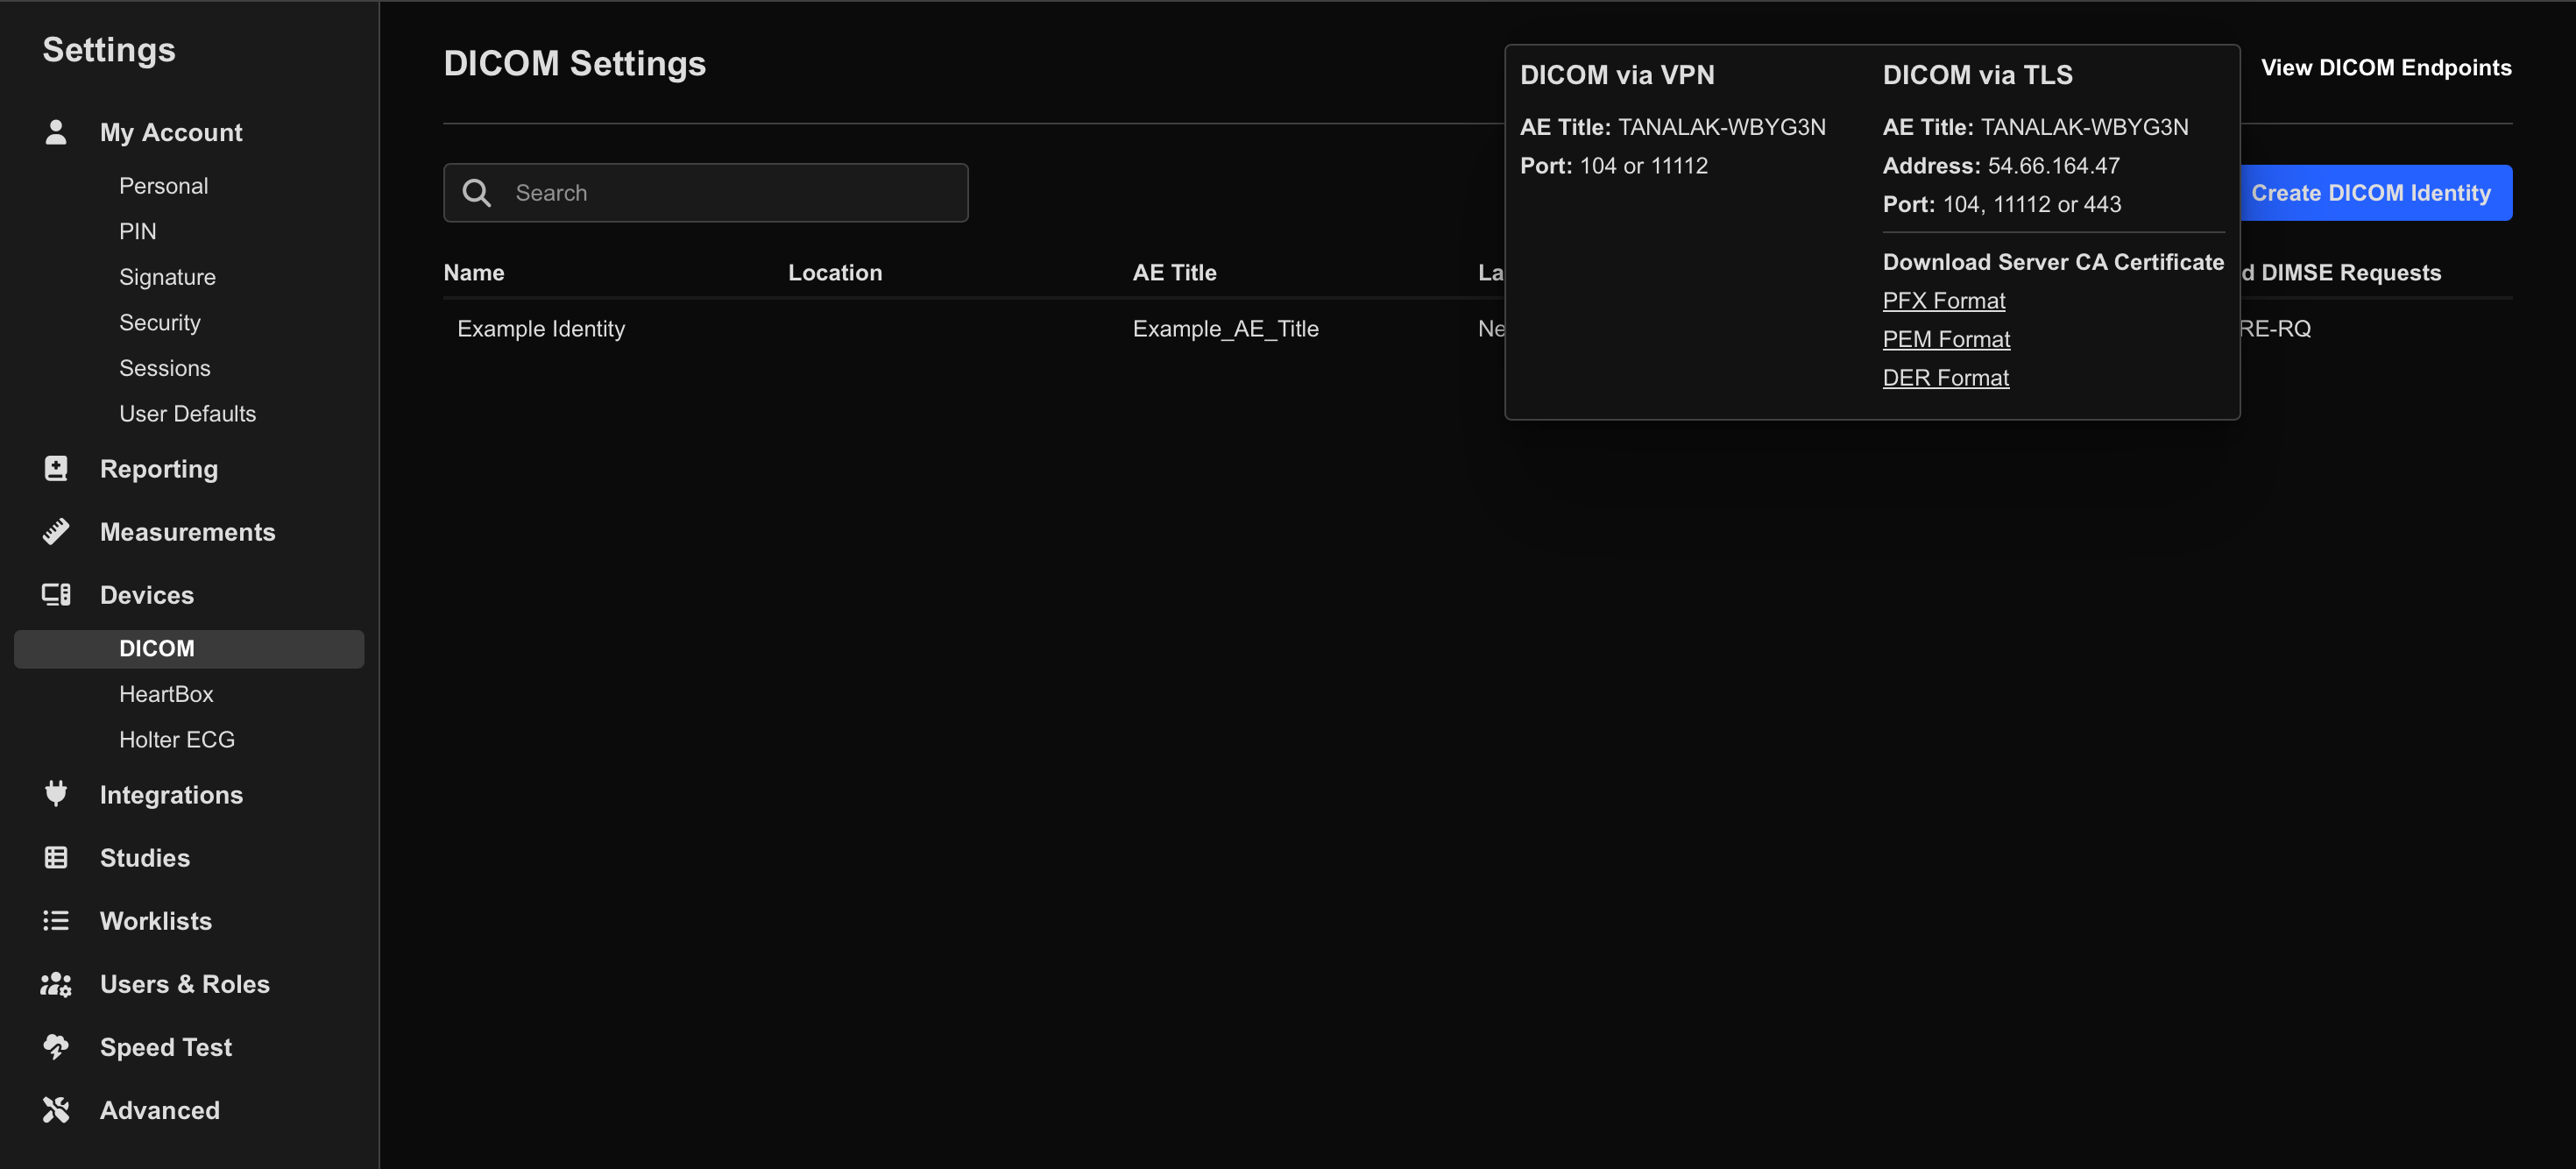
Next, create a DICOM Identity in HeartLab.
- Select Create DICOM Identity.

- Enter:
- Name: A recognizable device name (for example,
GE E95 - Room 1) - AE Title: The device AE Title
- Name: A recognizable device name (for example,
You should now have:
- Server AE Title
- Server IP Address
- Device AE Title
Download the Identity Certificate (Authenticated TLS Only)
Authenticated TLS requires a client certificate generated from the DICOM Identity.
- Open the DICOM Identity you just created.
- Select Download Client Certificate and save the file to a USB drive.
- Toggle Allow Anonymous TLS off.
Download the Server Certificate
The GE machine also requires the HeartLab Server CA Certificate to trust the HeartLab server.
- In HeartLab, navigate to Settings > Integrations > DICOM.
- Select View DICOM Endpoints.
- Under Download Server CA Certificate, select:
- PEM Format
- Save the certificate file to the USB drive.
Connect the GE Ultrasound Machine to HeartLab
Import the Identity Certificate
- Insert the USB drive containing the certificates into the GE machine.
- Sign in as the administrator user (commonly
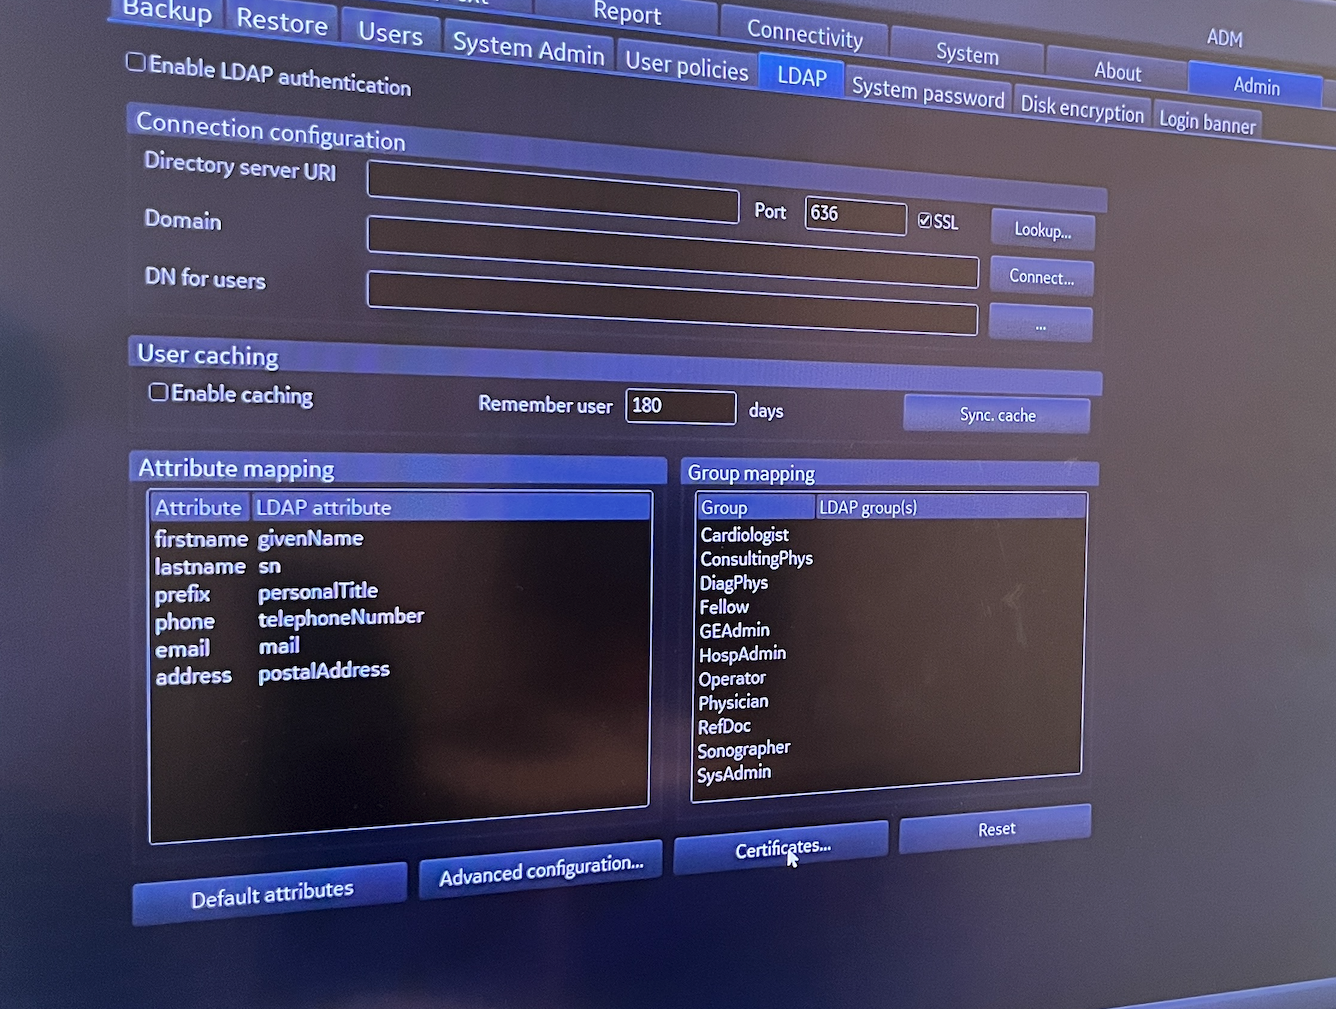
ADM). - Navigate to Utilities → Config → Admin → LDAP
- Select Client Certificates.
- In the dialog:
- Select the Personal folder
- Open the Certificates folder
- From the toolbar, select Action → Tools → Import
- In the Import Wizard:
- Browse to the USB drive
- Locate the DICOM Identity certificate
- Select Open
- Enter the password:
pulse
- Enable:
- Mark this key as exportable
- Include all exported properties
- Complete the wizard by selecting Finish.
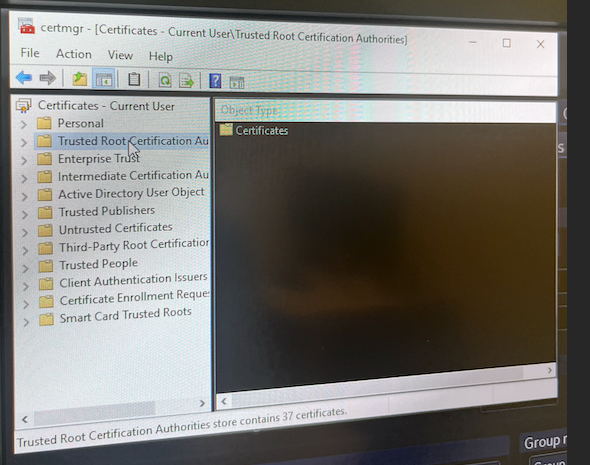
Import the Server CA Certificate
- In the Certificate Manager:
- Select Trusted Root Certification Authorities
- Open the Certificates folder
- From the toolbar, select:
- Action → Tools → Import
- Repeat the Import Wizard steps, but this time select:
HeartLab Server CA
Apply the TLS Certificate
- Navigate to Utilities → Config → Connectivity → TCP/IP
- Select Client Certificates
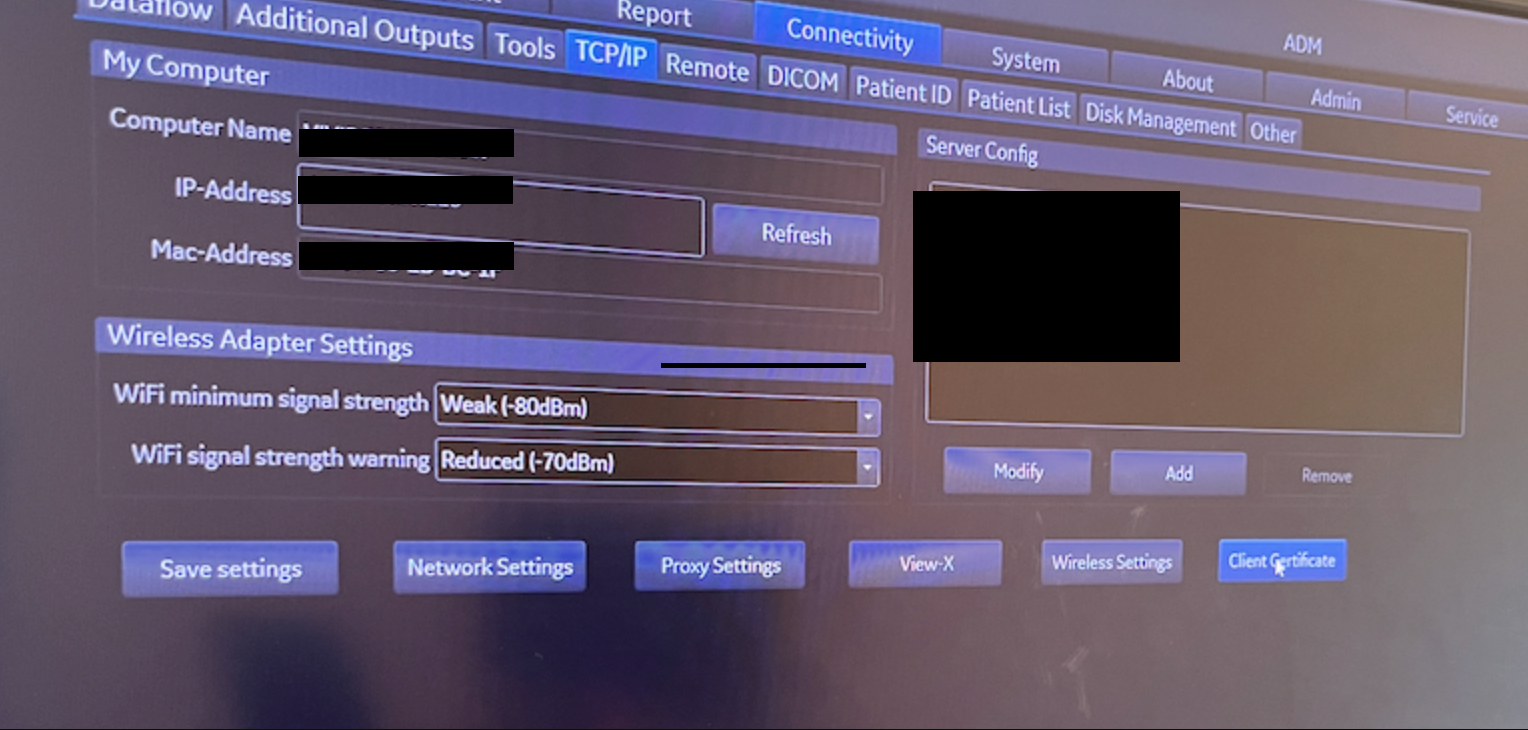
- Select My
- Locate the imported HeartLab certificate.
- Select the certificate and click OK.
Configure Dataflow
To configure study sending:
- Navigate to Utilities → Config → Connectivity → Dataflow
- Create a new dataflow or edit an existing one.

- Select Configure.
- Add:
DicomStorageto the dataflow outputs
- Ensure:
LocalArchiveServiceis added to both Inputs and Outputs
- Select
DicomStorageunder Outputs and click Properties.
Configure the following:
| Setting | Value |
|---|---|
| IP Address | HeartLab Server IP Address |
| Name | Friendly name (for example, HeartLab PACS) |
| AE Title | HeartLab Server AE Title |
| Port Number | 11112 or 104 |
Enable the following options:
- Transport Layer Security
- Verify Server Certificate
- Provide Client Certificate
- Allow SR
- Allow SR Private Data
- Allow Multiframe
Configure compression and timeout settings as preferred. If unsure, leave the default settings unchanged.
- Select OK to complete setup.
Verify Connectivity
After setup:
- Run the connectivity check from the GE dataflow target.
- Send a test study.
- Confirm the study successfully appears in HeartLab.
Troubleshooting
Common causes of failed DICOM transmission include:
- Incorrect AE Titles
- Missing TLS certificates
- Incorrect certificate installation
- Incorrect IP address or port
- TLS verification failures
 MFR
MFR