Connectivity
Lumify
Connect Lumify to HeartLab and configure automatic DICOM export.
Lumify
After connecting your Lumify device to the VPN, you can configure Lumify to use HeartLab as its PACS destination.
This guide explains how to:
- Connect Lumify to HeartLab
- Configure a DICOM export destination
- Configure automatic study export
If you have not already connected the device to HeartLab using a VPN or another supported secure connection method, complete that setup before proceeding.
Connect a Lumify Device to HeartLab
If you do not see these settings, your role may not include Integrations permissions.
Contact your HeartLab administrator if required.
- Connect the Lumify device to the internet.
- Connect the device to the VPN server.
- Open the Lumify application.
- Select Export Destinations > + > DICOM
- Configure:
- Destination nickname
- Lumify AE Title
Next, gather the required HeartLab DICOM endpoint details.
- In HeartLab, navigate to Settings > Devices > DICOM
- Select View DICOM Endpoints
- Under DICOM via VPN, note:
- Server AE Title
- Server IP Address
- Port number (usually 11112)
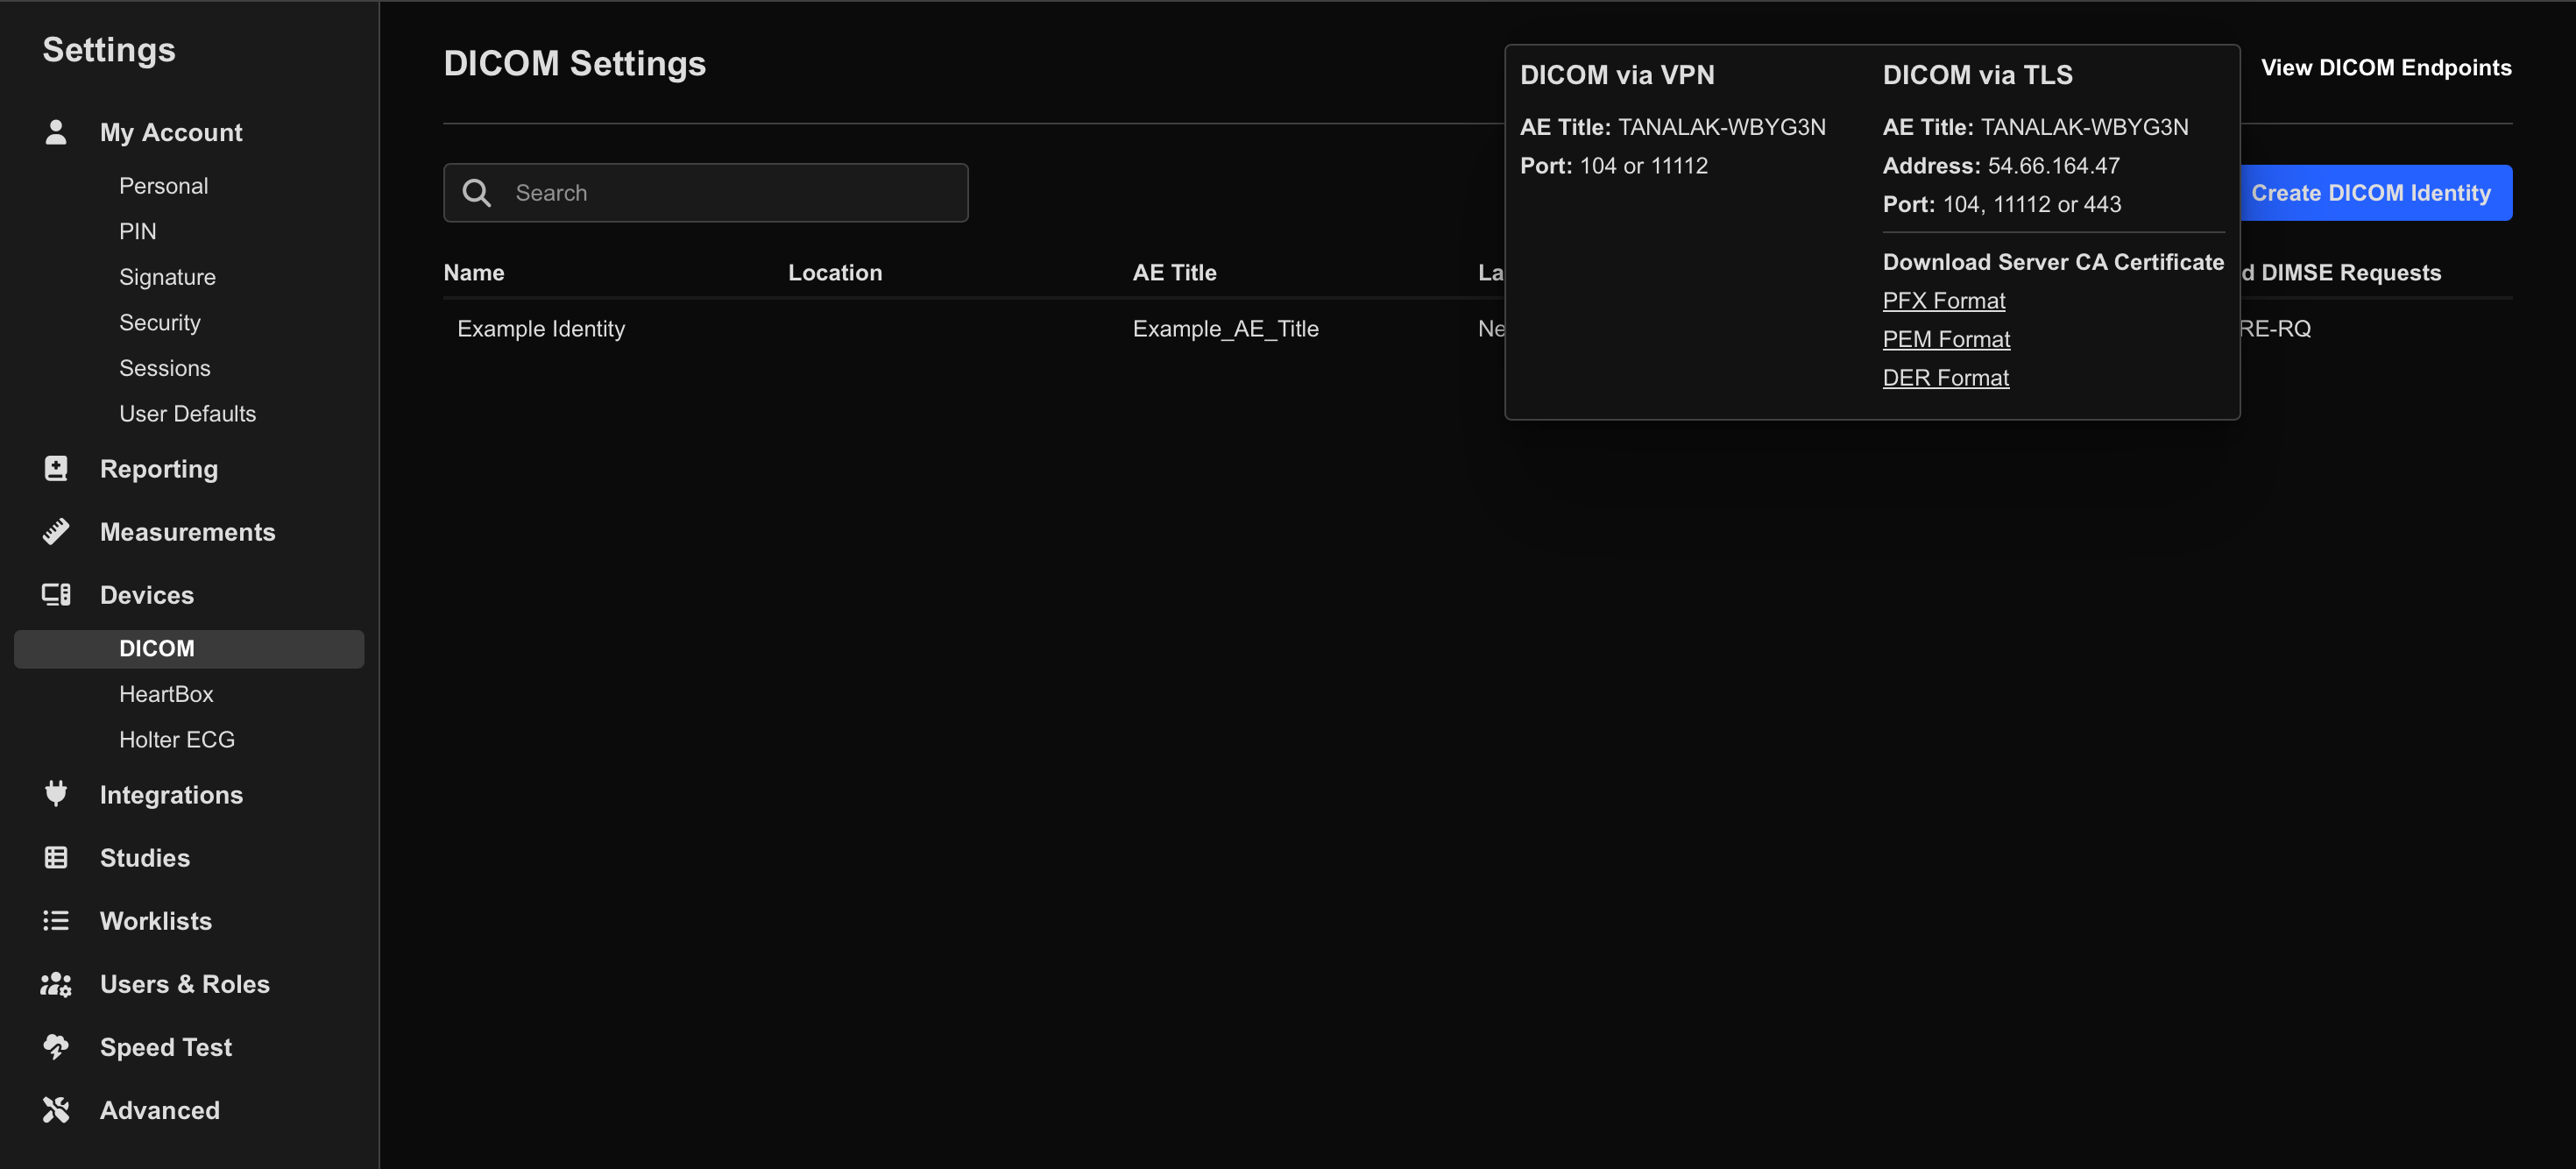
- In HeartLab, select Create DICOM Identity
- Enter:
- The same AE Title configured on the Lumify device
- A recognizable device name

The AE Title configured on the Lumify device must exactly match the DICOM Identity AE Title configured in HeartLab.
- Return to the Lumify device.
- Select Test
- Confirm the connection test succeeds.
- Save the destination configuration.
Configure Lumify to Send Studies Automatically
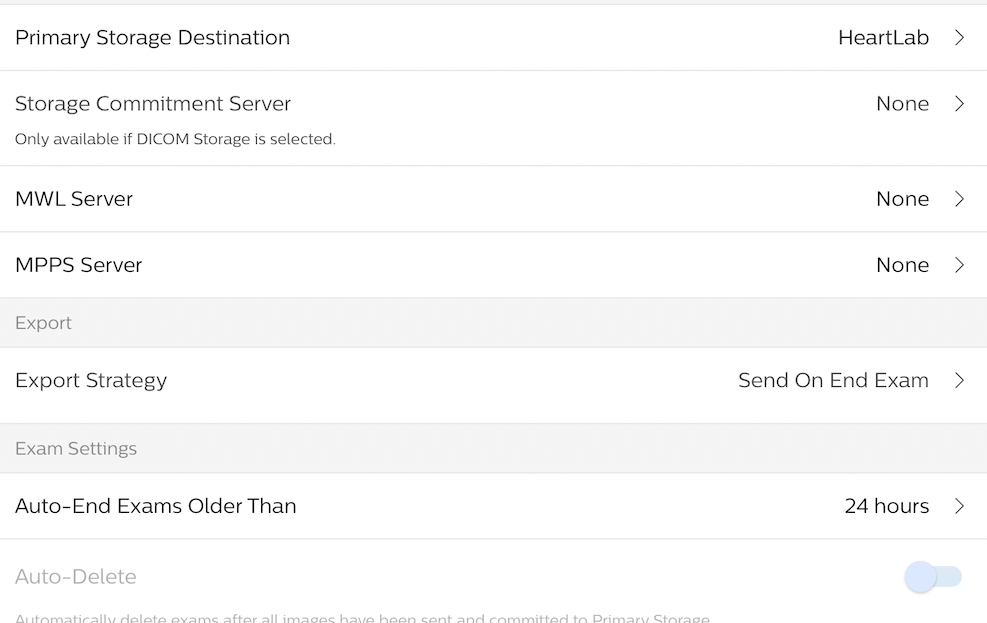
- In Lumify, open Connectivity Profiles
- Select the default profile or create a new one.
- Set Primary Storage Destination to the HeartLab destination created previously.
- Configure the export strategy as desired:
- Export on exam end
- Export during exam
Verify Connectivity
After setup:
- Confirm the VPN connection remains active.
- Run the Lumify connection test.
- Send a test study.
- Confirm the study appears successfully in HeartLab.
Troubleshooting
Common causes of failed transmission include:
- VPN not connected
- Incorrect AE Titles
- Incorrect HeartLab endpoint details
- Internet connectivity issues
If the DICOM connection test fails, first confirm the VPN connection is active before reviewing DICOM settings.
If studies do not send:
- Confirm internet connectivity
- Confirm the VPN remains connected
- Re-run the DICOM connection test
- Verify the DICOM Identity AE Title matches exactly
- Restart the Lumify application if required
 MFR
MFR